Building Confidence
| Volume 11 Issue 5 ISSN 1923-7162 |

Welcome to Dave's Shop Talk's Home Improvement Newsletter of questions from our members on their construction projects, a Tip of the Month and a home remodeling article, both from our website at http://daveosborne.com. We are into our 11th year putting out this Newsletter. Dan and I would not be able to do this without your input every month. Thank you and keep the questions coming!
Tip of the Month
Safety Tip: Don't use a grounded power tool outside in the rain without proper grounding. All outside plugs should be a GFCI (Ground Fault Circuit Interrupter). All power tools used outside should be plugged into one of these receptacles with a 3 wire grounded plug on the extension cord on both ends. Ref: How to Build a House 3: Services, Concrete Slab and Backfill.
And a Bonus Tip:
Safety Tips: Before changing bits or blades, be sure the power tool is disconnected from the power cord. Before reconnecting be sure the wrenches and adjusting keys are removed from the power tool, and the guards are in place. Ref: Tables 1: Rafter Table.
Ask Dave!
Dave:
You have helped me before with plans for my gazebo.
I have no windows in my finished basement. The basement is below ground at the front of the house and on the rear of the house the basement is all above ground. I have a two levels/storys that sit on the basement. The basement has exterior brick finish over 9 in concrete blocks. Interior was framed out with 2x4s and finished sheet rock. I plan to install two windows on the rear side that are 2 ft x 3 ft and 3 ft x 3 ft.
Do I need headers and lintels and how do I frame-out the windows? What size cutout should I make in the wall. The combined thickness of the wall is 19 inches. I am attaching a free hand sketch of the wall looking down from above. Hope this helps.
My challenges are: 1. how do I frame out and finish the window 2. for the cut- out do I need "lintels" to keep the bricks up and do I need headers and
where do I place the headers
Thanks
Winston
Hi Winston,
This is going to be a "fun" job cutting through the brick and block.
This is the way I would do this:
First you need to know the rough openings of the windows. As far as I know there are 2 standard openings; the West goes 1" less than the window size, so for a 2436 (2'x3') window the RO is 23" x 35"; the East goes with the actual size: 24" x 36". These rough openings will leave a space around the window jamb of about 5/16" to 3/8". If you don't have the windows yet, you can get this info from the sales person.
I'll assume that you have the Eastern rough opening of the same size as the window size: that is 2'x3' and 3'x3'. This is an assumption on my part, so check this out, yourself.
You need to support the brick, the block and the 2x4 wall with 2x4 headers for a 3' opening, all three will have the same size header or lintel. When I cut a window in an existing wall, especially replacing a window in a stucco wall, I frame around the outside of the window with 1x4, to cover the uneven cut around the stucco and if it chips, which it always does. This is the same technique I would suggest you use for around the joint of the brick and window. I'll draw you a detail to make it a little easier to understand.
Dave
Dave:
Got your suggestions. In supporting the brick, the block with the 2x4 headers, is this the same as framing-out the opening?
Also on the brick and block openings do I need to make the opening large enough to leave space for the 2x4 headers/frame?
Winston
Yes, for both questions. This will come clear with my drawings. All three will have the same size buck, it's called, except the 2x4 walls will be a proper header with cripples or jack studs to support it.
Any rough opening, yet?
Dave
Dave;
The rough openings are the same as the window size.
Winston
Okay, Winston, here are the drawings:
(Print this first one off to get a good look at it)


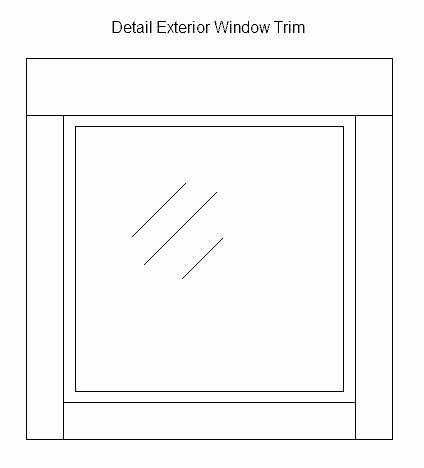
The exterior trim is a 1x6 for the header and 1x4 for the sides and bottom. These can be cedar or spruce painted or stained.
If I missed anything or if you have any questions, please feel free to ask. Even while going through the process and you have a doubt about procedure, I'll try to get back back to you as soon as I can. I almost always answer questions in the morning, unless I happen to be on the computer at the time the email comes in.
Hope this helps,
Dave
Dear Dave: I've built a handicap ramp using hem fir, and now I must stain it. I will also attach 6" wide 3M non-skid strips to the ramp. These are sticky back (extra sticky) strips. My question is, should I stain the entire ramp first and then attach the non-skid strips over the stained wood, or should I attach the strips first and then stain around the strips?
Best Regards, Roger, in Colorado (7000 ft elevation, high desert)
Hi Roger,
Either way will work, but easier to stain the whole ramp first then stick on the strips. If sticking them on after the staining, just be sure that the stain is good and dry. The stain seals the wood giving it a good base to stick to, as well.
Dave
Have a wooden deck that is in NEED of a new surface - Staining - Painting - ETC. Saw a short clip about Rust-Oleum RESTORE. A two coat top finish for wooden Decks. Have you ever heard about this type of finish? I realize that you must prepare the old surface for any type of Stain/Paint/Etc., and will do my best to clean the surface prior to "Whatever". I will need to replace one or two boards, but otherwise surface is in pretty good shape.
Thanks - Greg
Hi Greg,
Rust-Oleum is a good product. I haven't used their deck restore, but their rust paint has always been good. With most deck coating products, you need a lot of product which makes it expensive. Before committing yourself be sure to check out the coverage for a can of the stuff and figure out how much you need and the resultant cost - times two coats.
Dave
Feature Article of the Month
(taken from our website: DaveOsborne.com
Deck 3: Deck Design
I built a backyard wood deck about 22" off the ground, off the back of our house. I didn't want to install handrails so I decided to install seats around the perimeter instead. This article is more about how to design a backyard wood deck than the structure of the deck. The structure is the same regardless of the height of the deck off the ground. A backyard wood deck still requires footings, posts, beams, joists and decking material. You can refer to the first article, Deck 1: Raised Backyard Wood Deck on how to construct a backyard wood deck.
Backyard Wood Deck
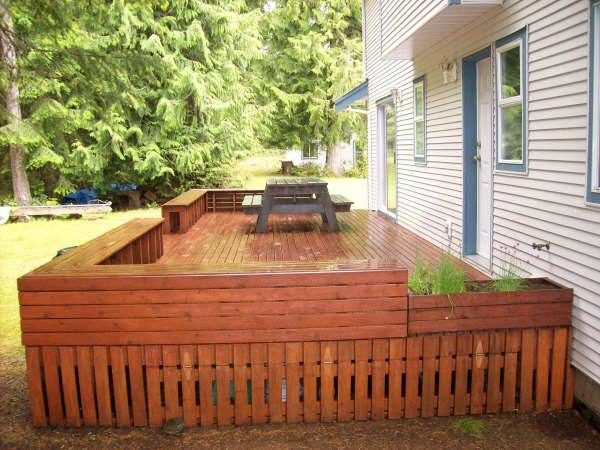
According to the building code, backyard decks lower than 24" from the ground do not require handrails around the deck. We don't want our guests to step off backwards either, so I put in seats around the perimeter of the deck. We've had many people sitting around chatting on our backyard deck.
Design Change
Where the herb box sits, I originally intended to build a... Read more at Deck 3: Deck Design
Almost the End
I didn't get too many questions this month worth discussing in this newsletter. I think it gives you an idea of what we do on our website, though.
If you need advice on your projects at work or home, please become a member of our website, then send me an email. Check out our website! http://daveosborne.com
Your source for building tips, woodworking & furniture plans, house plans and building advice directly from Dave...
Hi, I'm Dave Osborne. With over 50 years experience as a journeyman carpenter, foreman and contractor in heavy construction I enjoyed working with apprentices and sharing the tricks of the trade that others shared with me. Now I get emails from Members all over the world and we include many of my answers in our Free Monthly Newsletters. Some of my answers include drawings and instructions specific to a project, but may also answer your questions. I use correct construction terminology, so you can confidently inform your building supply dealers or contractors exactly what you need.
ASK DAVE!
The Benefits of Membership
Membership gives you full access to our hundreds of how-to articles, woodworking plans, converters, calculators and tables. Our Stair Calculator is one of the most popular on the internet. We have projects you can build for (and with) your kids, furniture for your wife, and sheds and gazebos. If you run into a problem or need advice your Membership includes unlimited email questions to me through our Ask Dave quick response button.
Join us!
Copyright © 1999-2026 DDFM Enterprises. All Rights Reserved. DDFM ENTERPRISES, DAVE'S SHOP TALK and the Dave Osborne logo are trademarks and service marks owned by DDFM Enterprises. All other trademarks on this site are the property of their respective owners. Site design by Design Strategies, Inc.