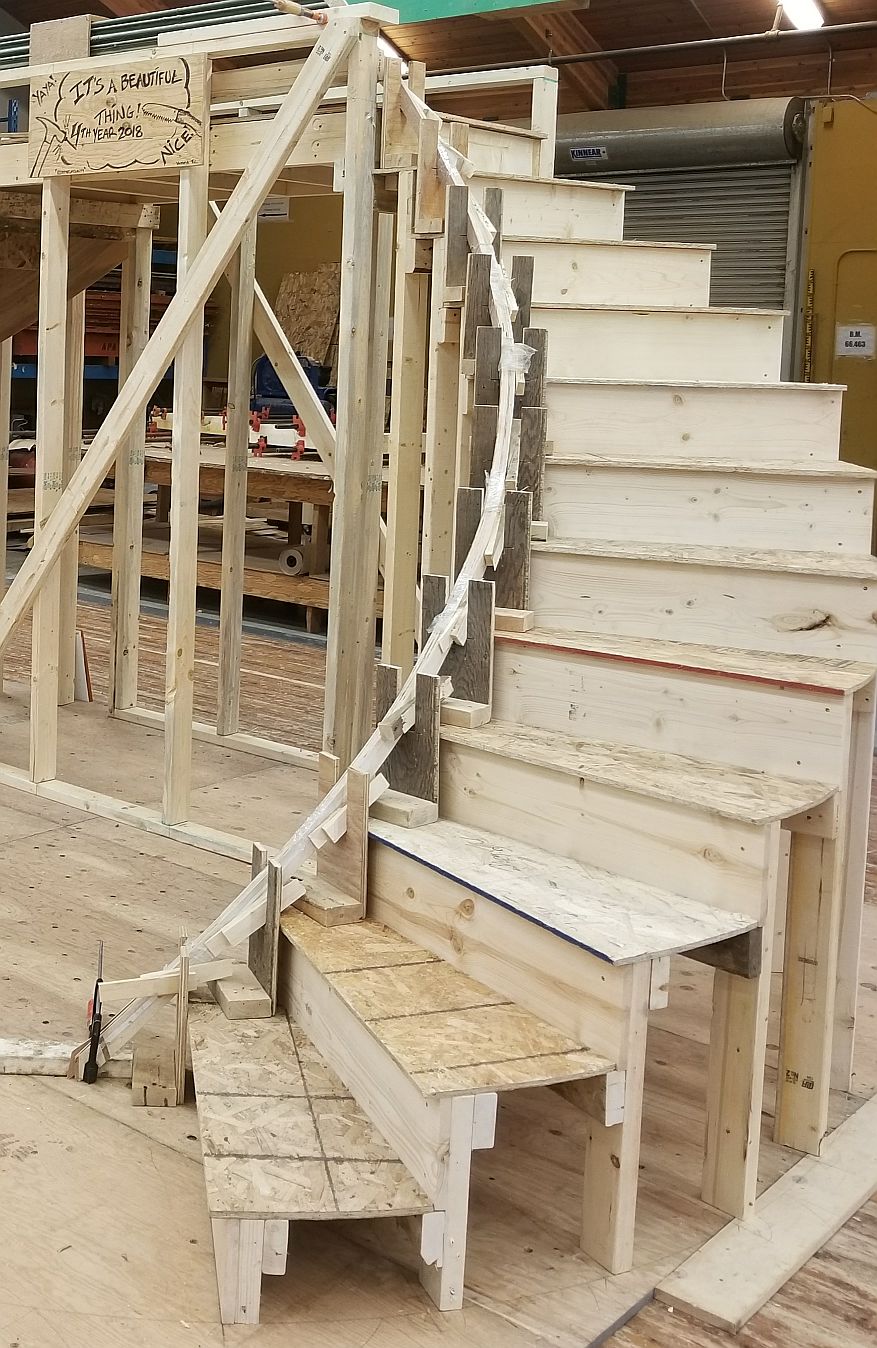
Member Project Photos
These are photos of Dave's grandson's fourth year carpenter apprentice test results.

Well Done, Dylan!
![]()

![]()
![]()
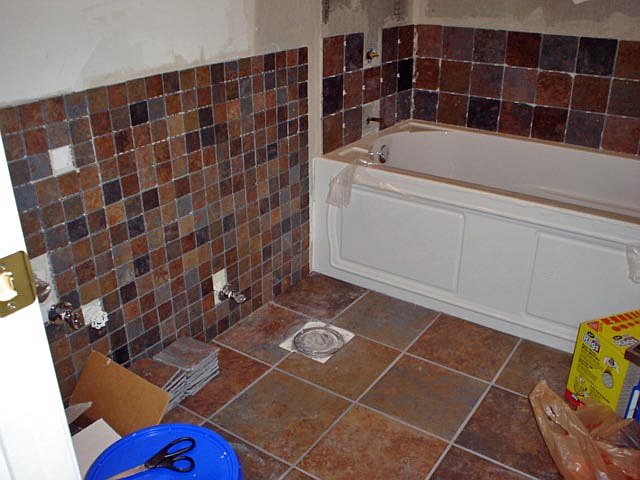
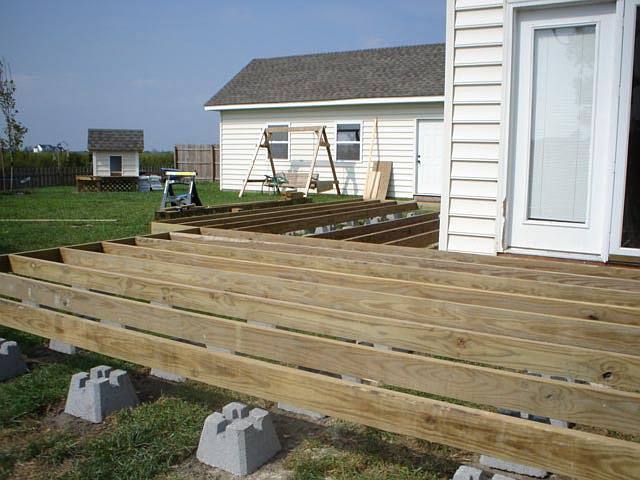
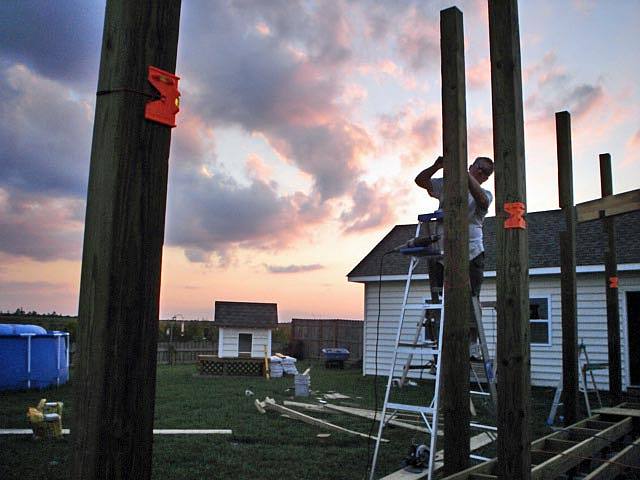
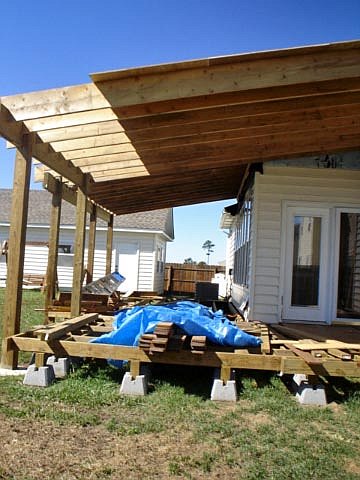
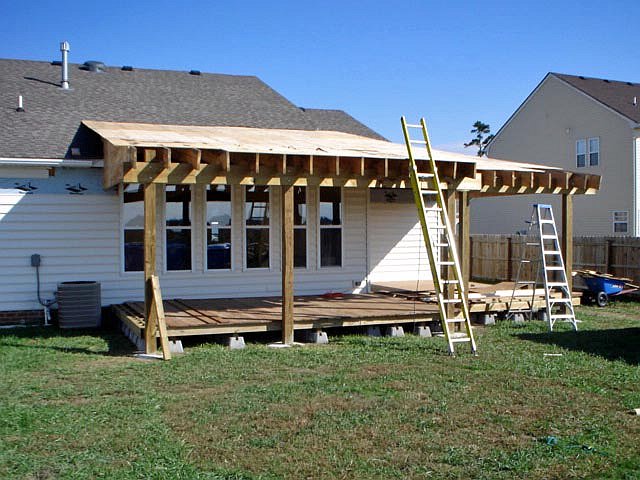
Hi Dave,

Thank you for your help on the project pictured: stair and railing plus
lattice work on deck. Could not have gotten through either without your
assistance.

Regards,
Trace

![]()

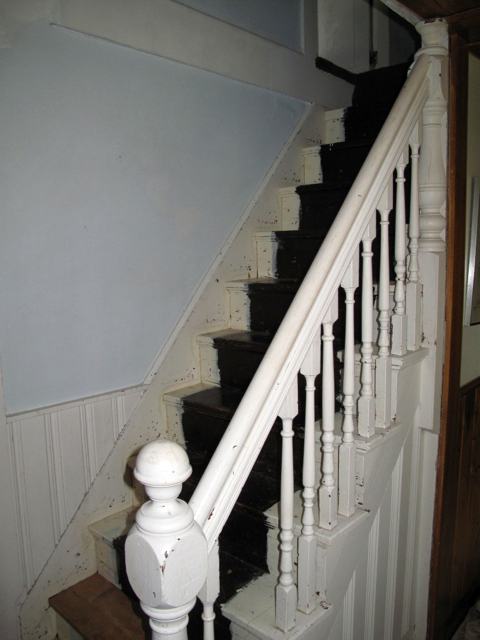
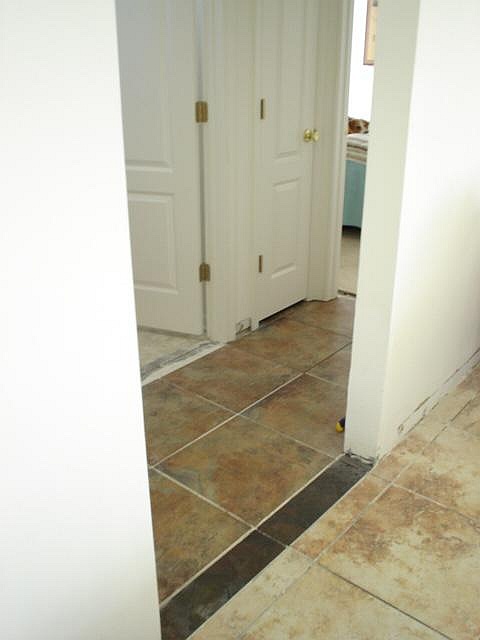
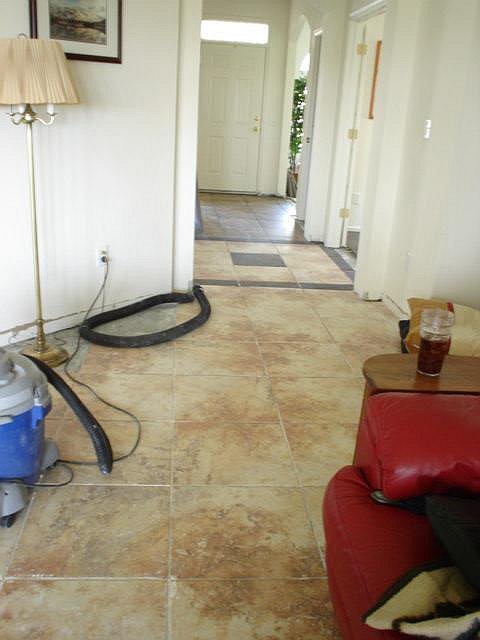
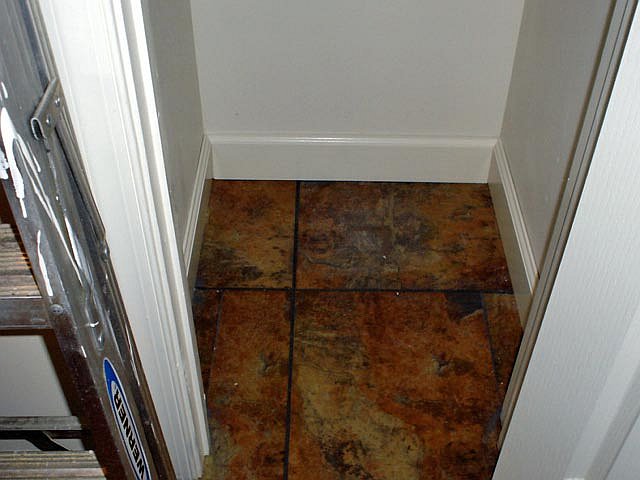
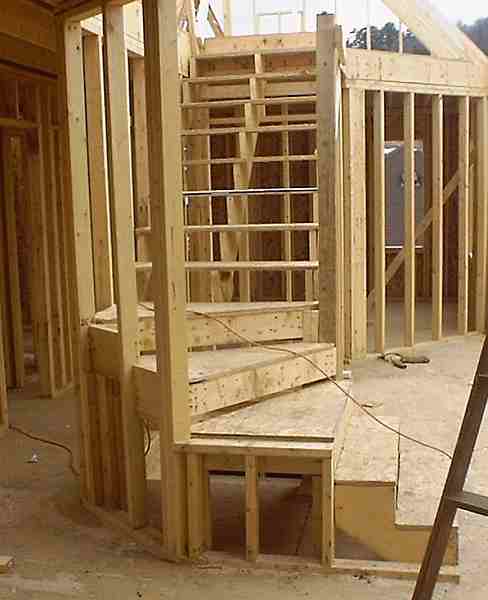
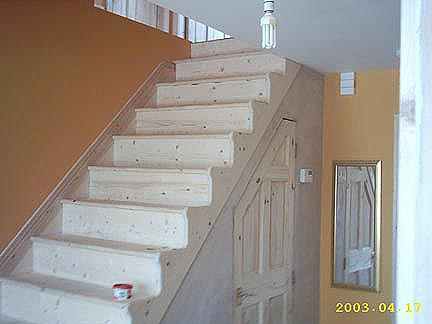
Hi Dave!

I hope you remember me. I think we last corresponded back in Oct. I was the
one with the badly built and narrow staircase. You helped me get started on
a path towards new stairs, and you also gave me an initial plan, with some
new winders, and some guide measurements on how to proceed.

Well, I thought it was appropriate at this time to give you an update of
my project, along with pics. Here a series of photos on that. The first one
is of the old staircase, which didn't even have proper stringers to support
them.

The last photo is taken from the cellar looking up, so it's kind of an upside
down view. But you can get a good idea of the winder landings, along with the
new set of stringers (3 2x12").
The whole staircase is now a lot more solid. Not only that, but the treads
are wider (9 1/2" with nosing), and the winders make the staircase look a
lot better. I will also attach a handrail on the opposite wall going upstairs.
(not yet shown in the photos). What do you think? (Confession: I got some help
with this. A carpenter friend of mine helped me with getting the landings and
stringers structurally sound. Without his help it would have been very
difficult for me to accomplish this.)

Thank you Dave, and hope all is well with you.

All the best,
Andre
![]()

![]()

![]()

This is a photo of the china hutch custom plan I did for Ken. He finished it in a red oak stain. Ken made the drawer fronts and doors himself using router bits for the purpose, according to the plan. He wanted it to fit the alcove in his house with the molding profiles to fit another cabinet he made earlier. He did a great job, up to his high standard.
Checkout this craps table with Ken shown for scale. Ken writes,
It is a miniature, exact replica, 5' craps table coffee table for our living room, with all authentic parts (rubber diamond bumpers, rubber railing, etc) including dual solid wood curved chip trays hand made by me from scratch (no plans � I've made it up as I've gone alone). I have a fairly expensive background in most techniques so I believe I should be able to handle this project.The china hutch was a challenge to design as was it a challenge to complete. Well done, Ken.

![]()

Hi Dave,

I completed the "kids table". I'm a novice with limited tools:
a table jigsaw, hand held circular saw, sanders, and a hand jigsaw.
It turned out pretty good, except that I tapered the back legs of
two of the chairs the wrong way. I decided to leave it that way,
since the projected was completely assemble before I caught the error.
I made three chairs and altered the table surface size to 30" by 30",
as directed by my daughter-in-law for her three small children.

Jim

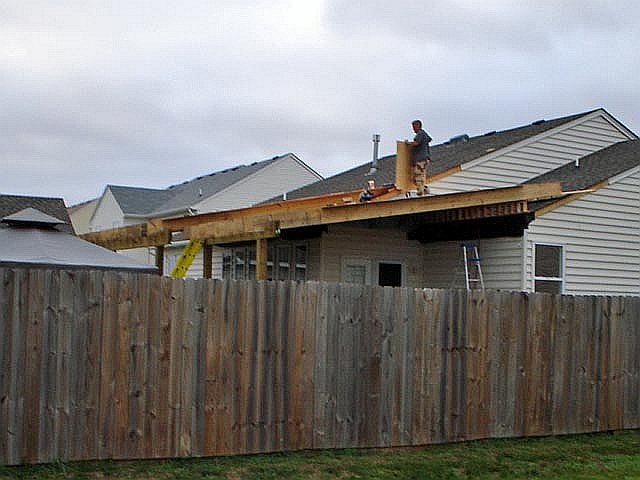
Hi Dave,

Not even sure if you will remember me Dave, but you helped me with my
leisure building/pool house I built in my back yard. I've finally
finished it (1 1/2 years later) but I wanted to get you a picture or
two and also to say thank you! You were an invaluable part of this
project. Not bad for someone who never even so much as considered
building anything before. It took so long because I built it myself
and saved over $20,000 based on the two bids I got from contractors to
build it. Thanks again Dave!

Marc
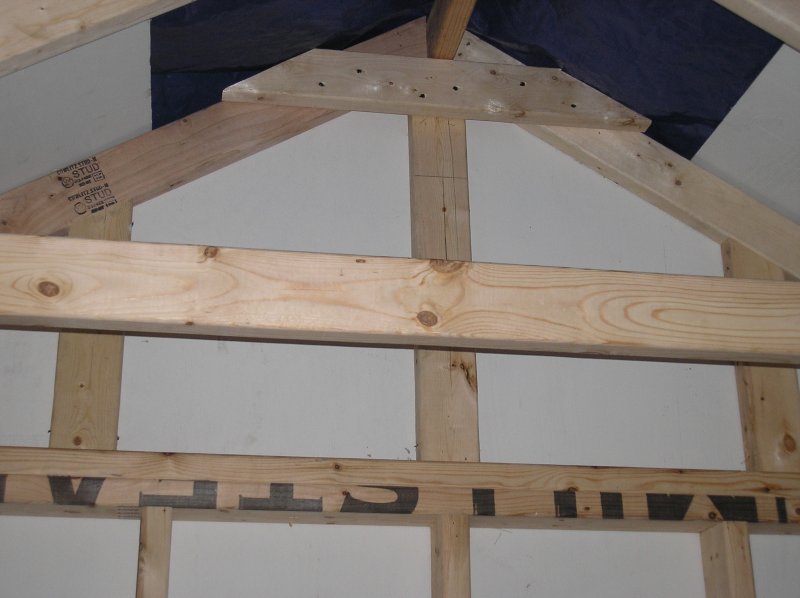
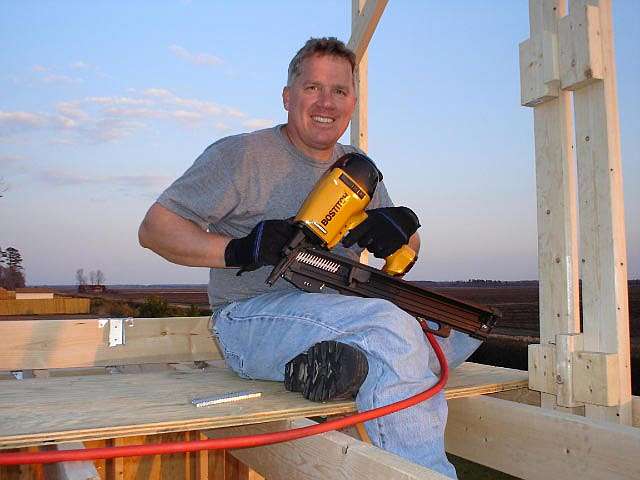
Dan
I was surprised and pleased to see our shed pictures still on your
website. [see below]

I've attached a couple of other framing pictures that I think would be
helpful to others. After viewing prefab sheds, I found the biggest
question mark was what framing plan to use.

Bob
![]()

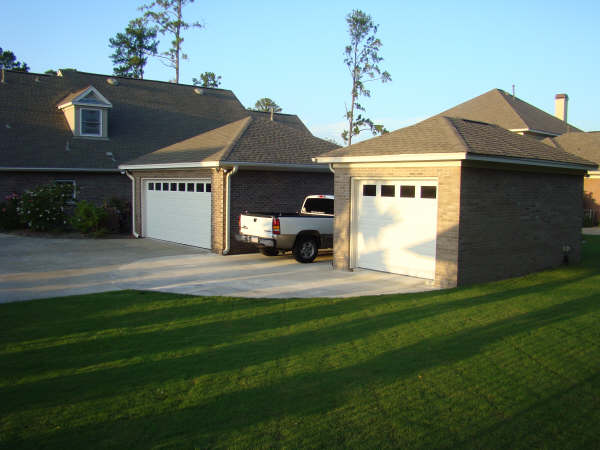
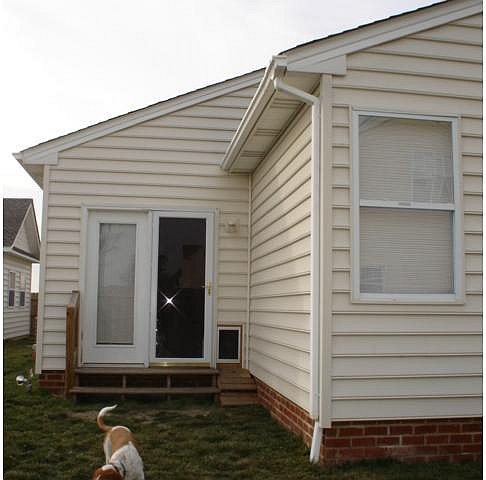
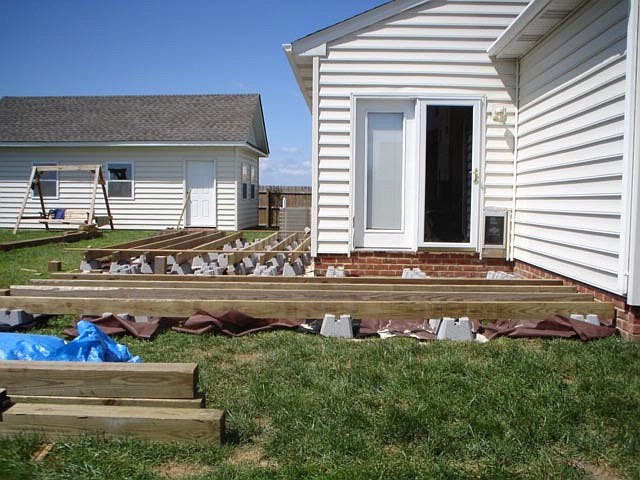
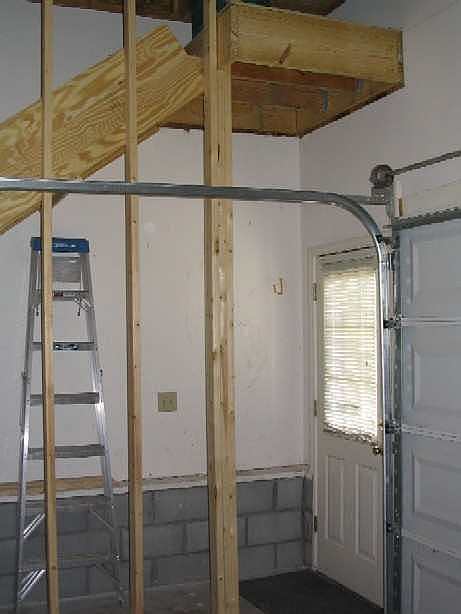
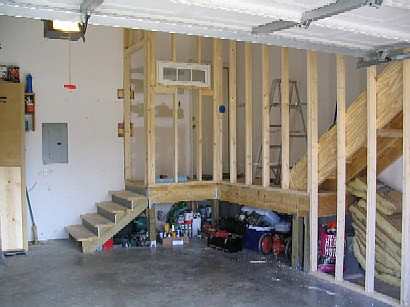
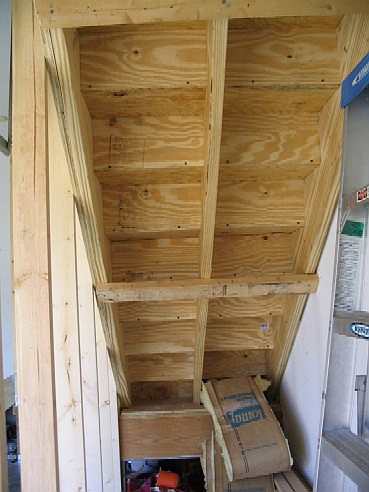
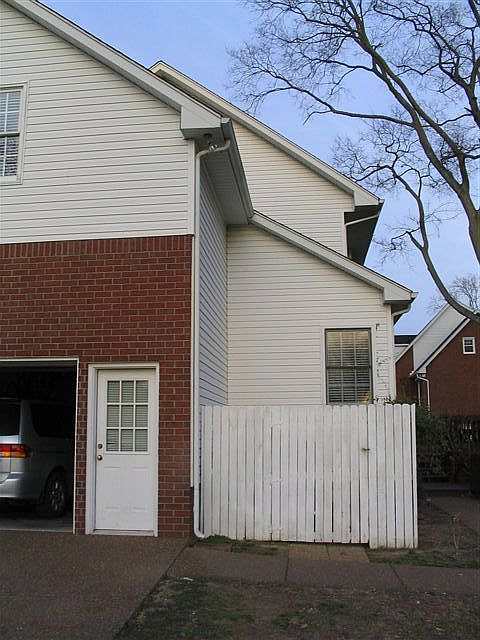
Dave, Just wanted to send you a few photos of the finished workshop
I built with the plans you drew for me last fall. As you can see
it ended up matching the existing garage nicely. Needless to say,
I couldn't have done it without your help.

Regards
Jim

![]()

![]()
![]()

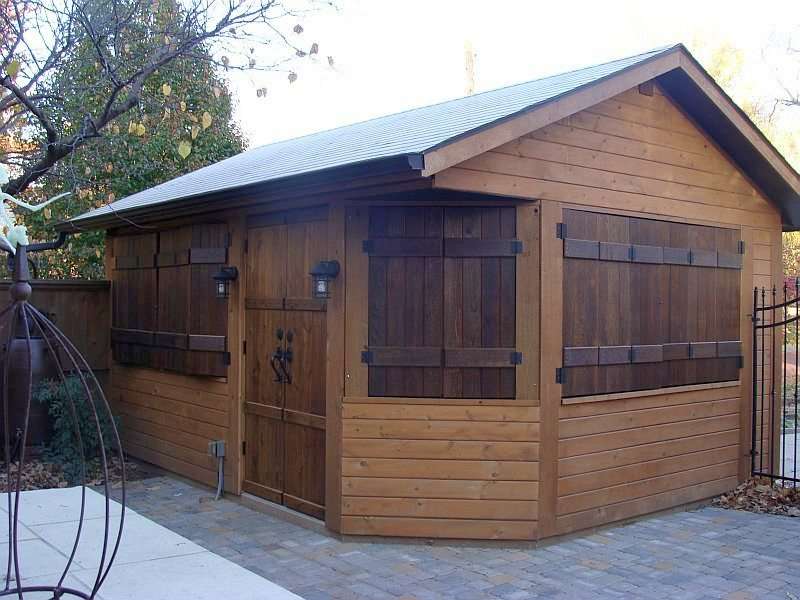
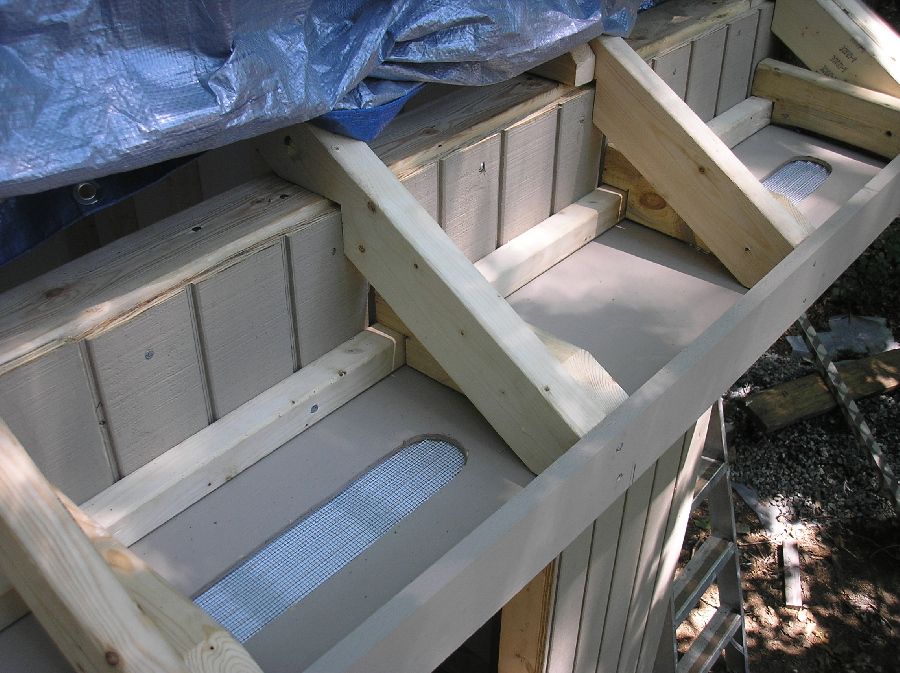
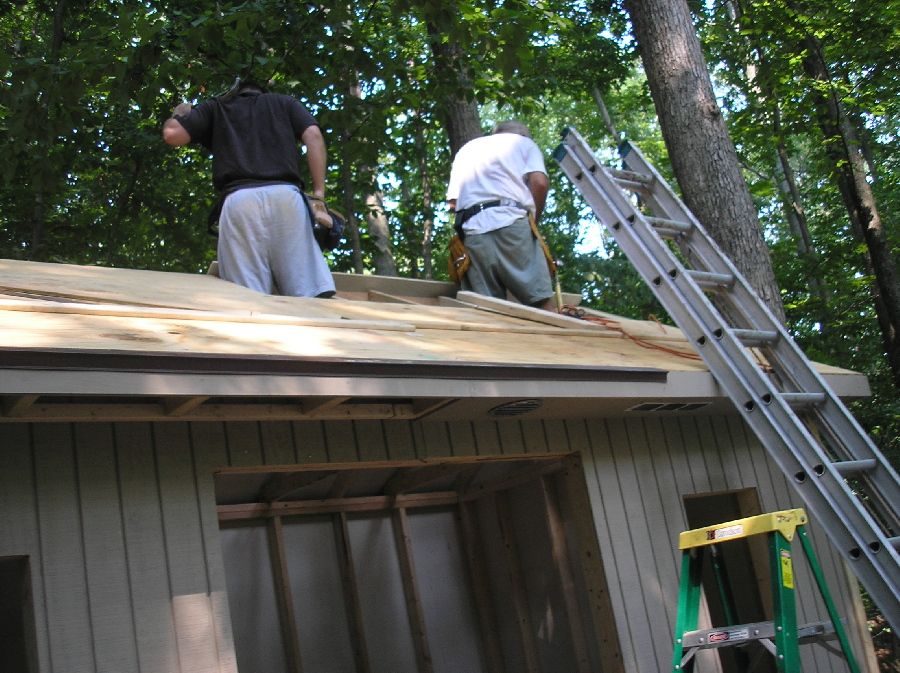
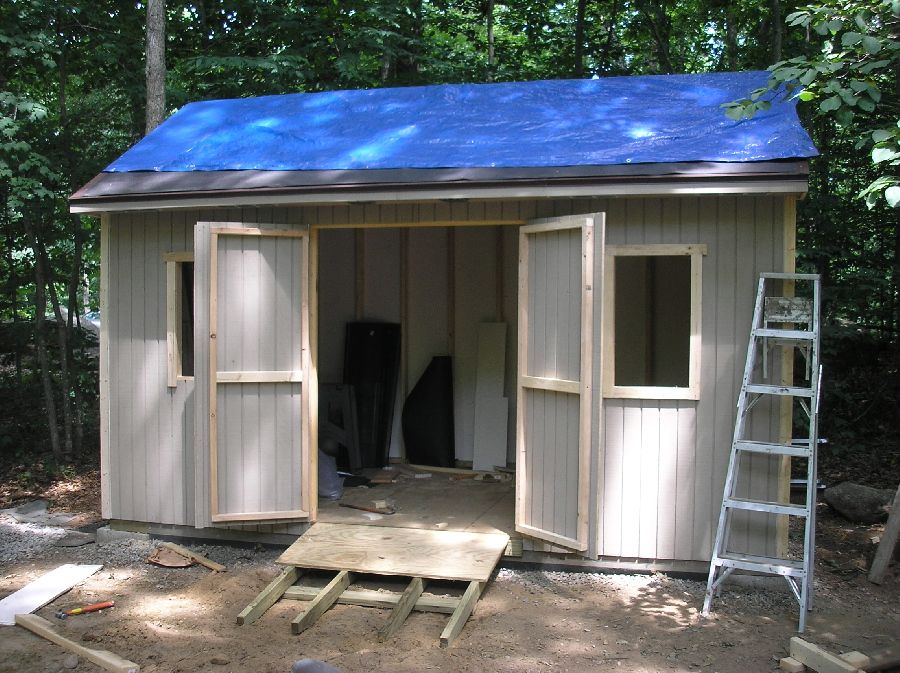
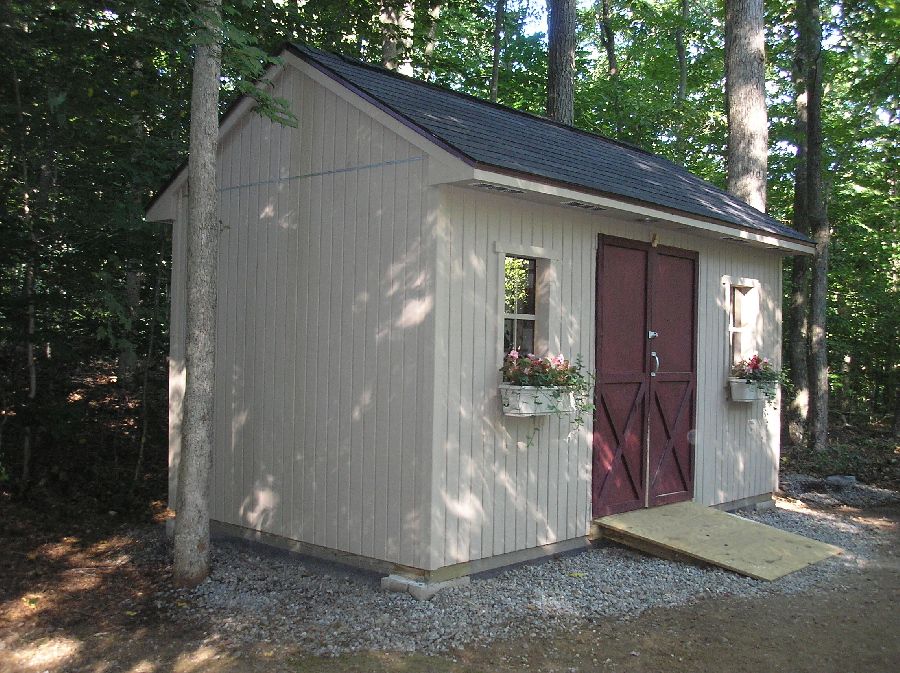
Hi Dave,
Love your web site

Looked at available sheds at lumber yards and decided to build our own,
so ordered a couple of sets of shed plans from you,
printed off things like rafter cuts and soffit instructions
and came up with our own design ideas:
- like windows from Plexiglas
- ridge vents
- wire hardware cloth nailed to the outer frame and buried 6" deep to
keep out critters under the foundation
- painted the inside of the roof sheathing and texture 111 white to
add brightness prior to nailing it up (a lot easier).
- ramp made from leftover pressure-treated flooring
- studding started in the middle of the walls and went out 16" with
20" pockets on each end
- also made pockets in front and back walls to drop in (2) 8' 2x4's
so as to provide a rack for the kayaks for the winter storage.
- lots of pocket wells in the stud bays for tools
- added 1x4 filler pieces between studs to extend the depth of
the back edge of the shelves.
- used the same colors as the house to make it part of the complex
- added window boxes and xmas wreath to finish off the project
- should have added power - maybe next year.

The result was an 8 x 14 shed which includes the best of all ideas
- my son really enjoyed it as I did.
We think it is pretty special - already had a couple of folks
taking pictures so they can use for ideas.
Thanks again for your help.

Bob
![]()

![]()

![]()

![]()
![]()
![]()


![]()

![]()
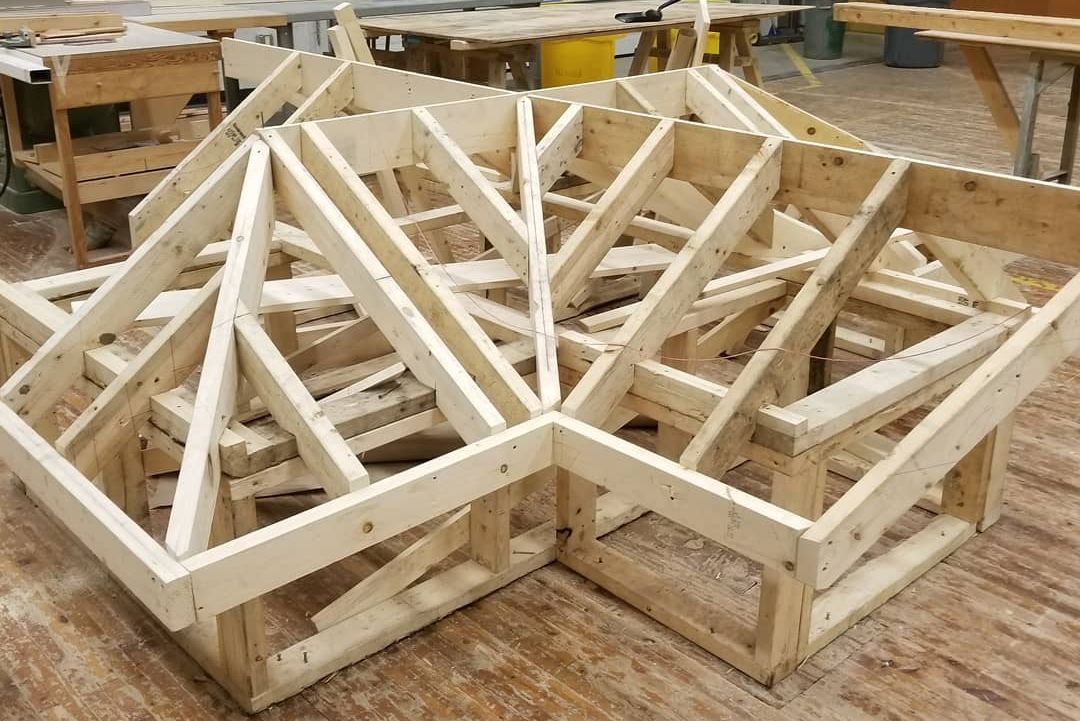
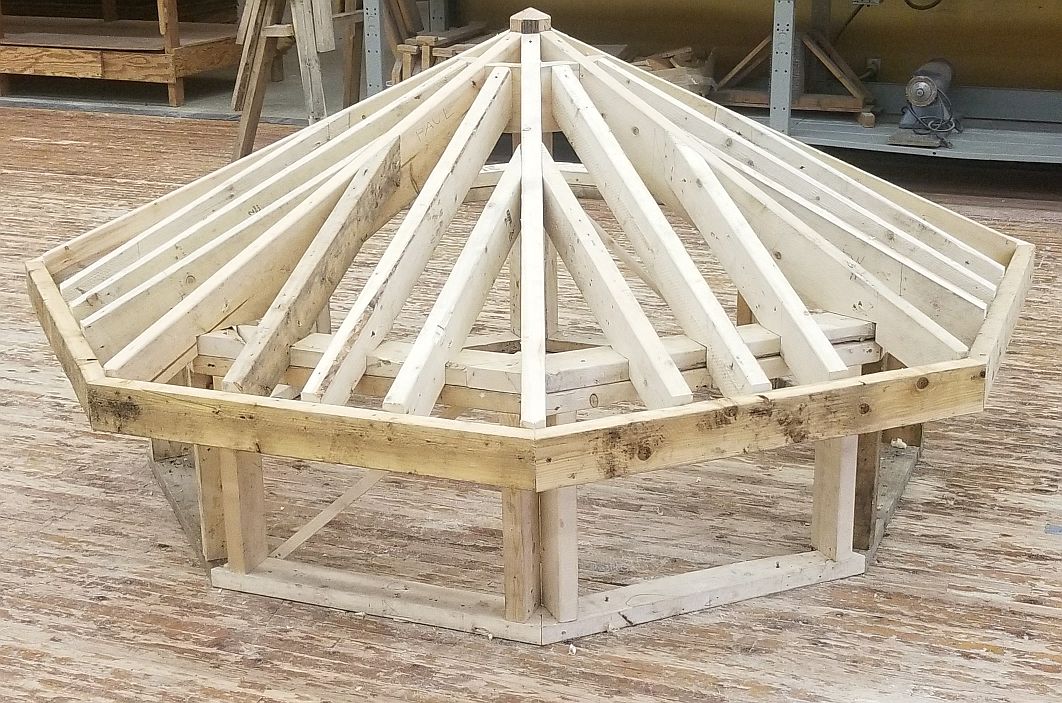
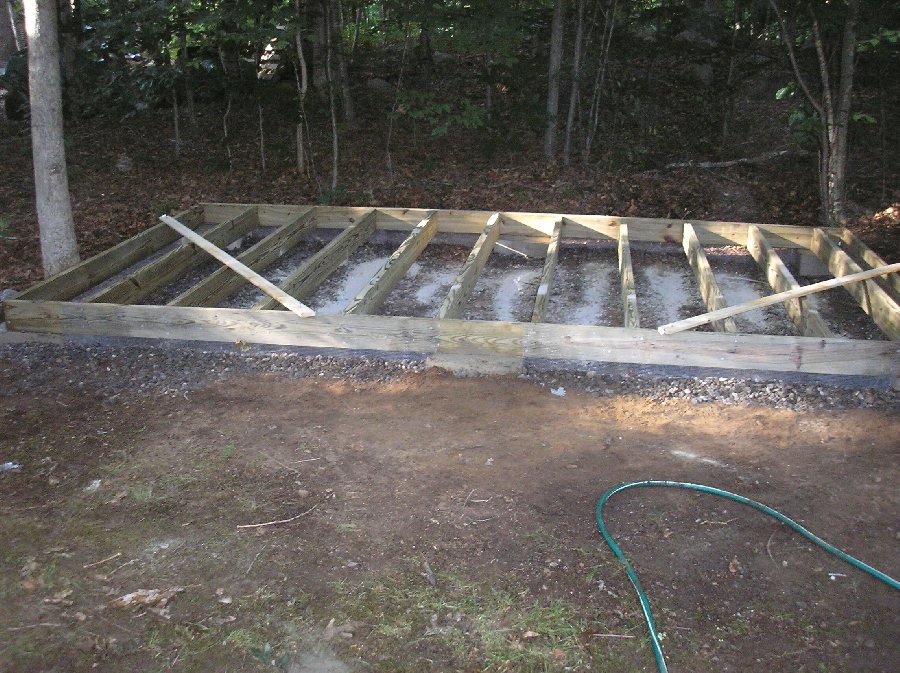
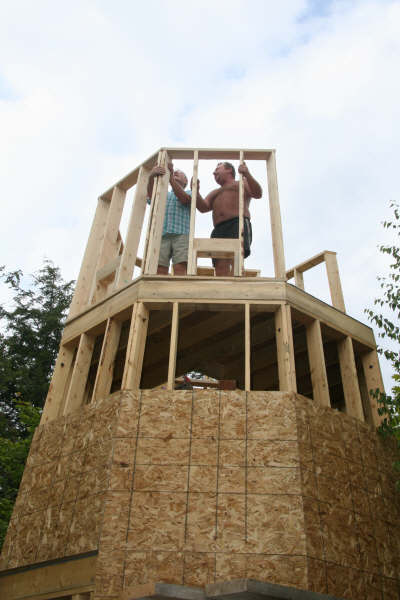
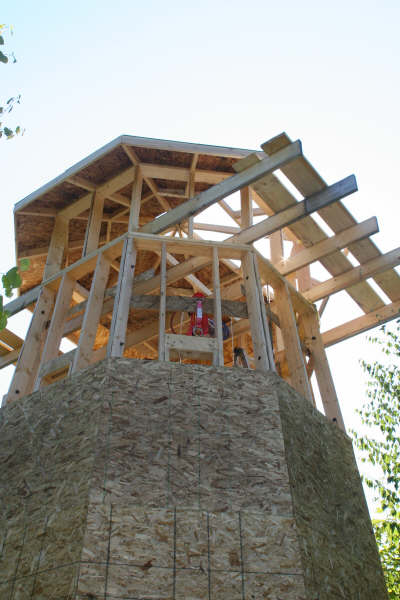
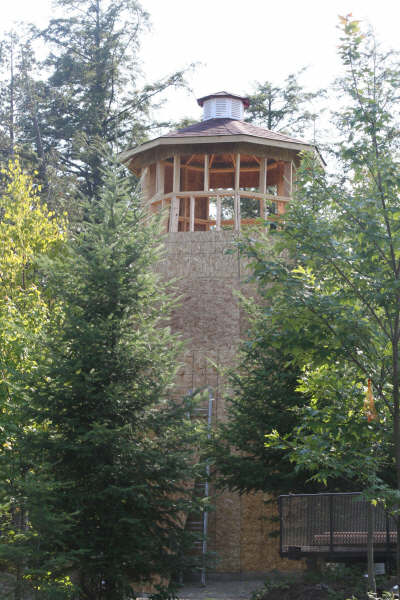
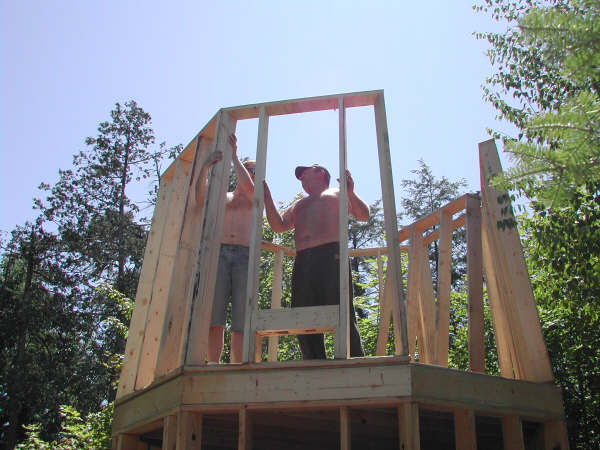
Hi Dave,
I promised to send photos so you would see what we had been up to.
The photos I've attached just show various stages of the progress
of the building. Your instructions for the octagon gazebo were a
big help in building our lighthouse. Adjustments were made using
AutoCAD to get different dimensions as we were only allowed 10
square metres for footprint, and to figure out dimensions for the
tapered walls. It has been a challenge and we have enjoyed every
day that we worked on it. Even when we found a mistake because we
forgot to take into account the diameter change in the taper on
the floor joists with the tapered walls.

Thanks for all your help and the wonderful website!! I have used
it several times for the stair calculator and to help other
people by having an easy to read and understand set of instructions
available.

Sincerely,

Jaana

![]()

![]()
![]()
![]()
![]()

![]()


![]()

![]()

![]()

![]()
Dear Dave,
Here's my office from a 12x22 foot garage. I had a door and window
installed, threw out the garage door and the walls are 4x8 panels
from Home Depot. I paid an electrician $550 to wire a new second
circuit and my son and I installed the ceiling for $200, which is
my only regret, as it should have been a dropped ceiling. Wish I had
asked you back then in Dec 2005. It is uneven and falls down, we
duct tape it back. Duh.

Tell the rest of your members about my site: "Grow your idea with
www.cadsulting.com Design Drafting and 3D Concepts Product Design."
Dave

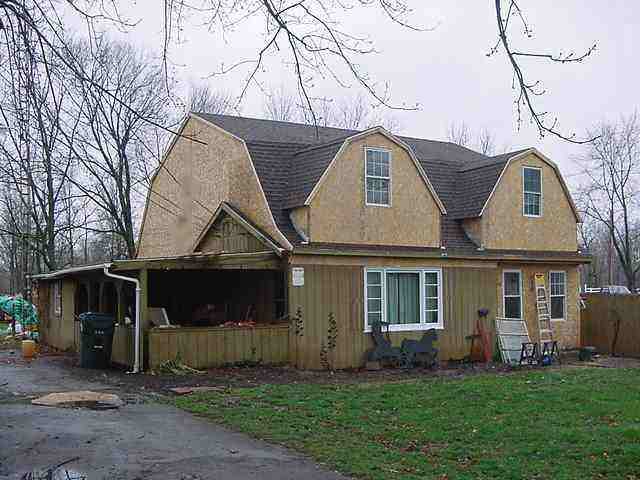
Hi Dave,
Well here it is. I used the plans from the site and viola.
I did have to make a few minor adjustments but they are all hidden!
This was my first attempt at a gambrel roof, and all things considered
it went well. I only used plywood on the roof. I was given some
spruce logs, cut them at my brother-in-law's sawmill, left everything
rough except for the trim and poof 2 weekends and it was done.

Love your site
Thank you
Clem

![]()

![]()
Here are some photos of several jobs tackled by Pat and Pete.
Dave,
Here's a couple pix of the porch/deck. It's looking awesome and so much
bigger as it gets closer to completion. I finished putting the Ipe down
on the deck under the sunroom windows yesterday. Eb-ty clips are very
good and worth the price, but don't use the glue. The reason I say this
is several times I got almost to the last clip and either found a sly
crack or previously unseen flaw or the board was so 'bent' I couldn't get
it to slide in. Ipe boards are so hard and they all LOOK pretty much
straight and perfect, however some things don't become apparent until
you're actually working the board. Glue added to the mix would have
been a disaster. On the web all instructions say to use glue but the
forums say pretty much use glue only if you are a total perfectionist.

This deck reminds me of an old fashioned country porch, nice and relaxed
feel and hey! where's my rocking chair?!! Dogs love it too. especially
crawling under it. Maybe we'll need to leave an access panel for them to
get under.
Pat
![]()
![]()

![]()
![]()
![]()

![]()
![]()

![]()
![]()


![]()
![]()
![]()
![]()
![]()

![]()
![]()

![]()

Dear Dave,
Thought you might be interested in how our porch roof ended up thanks
to your help. We had to settle for a 3.5" pitch because of having to
match the roof up to the room on the left and because of the eaves from
the main roof. All in all I'm pleased with the way it turned out
despite the fact that there were some minor mistakes but then again I
wouldn't consider myself a carpenter. I've had worse mistakes by so
called professionals in their trade. It certainly was not the easiest
roof for an amateur to build. Thanks again.
Bill

![]()

Hi Dave,
With your help from your website and a few other e-mails from you
personally, I was able to finish building a house. I'm sending a
few pictures your way. After all, you helped. By the way, I just
returned from Bellingham and my old Army buddy took my wife and me
to Victoria. On the way back we passed the turn off to your town.
It's very pretty there.

Mike from Kankakee, Il

![]()

![]()

![]()
![]()
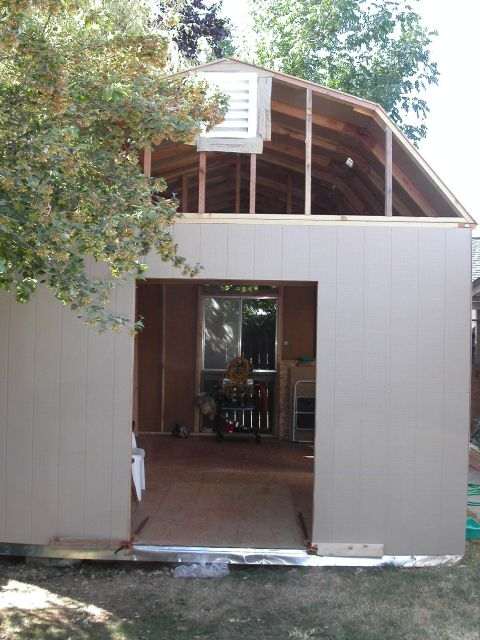
Here are some photos of the Gambrel Roof Shed With Loft constructed by Hans. (Click on each photo to enlarge it.)

![]()
![]()

These are from a machinist who got some help on his stairs (see How to Build Stairs), got ideas on gambrel roofs (at Gambrel Roof Shed) and built window seats with help from Bench Seat Plans.
His house started out at 1100 square feet and is now 2632 square feet. He says of his two sons that "they will be able to come back, God willing and show the house they built with their own hands."
Thanks for your articles and help.

The first photo shows the original structure somewhat. The second shows
the latest addition. Wife, daughter, 2 boys and myself have done the
work (not exactly in that order).

Chuck
![]()

The help on these stairs came from several articles: How to Build Stairs and Answers to Questions on Stairs.
Hello Dave,
Just wanted to say thanks for your web page and all the helpful information.
I was able to build my winder stair case, thanks to your help!!!!
When I get my finished treads down I'll try and send you a picture.


David

![]()
![]()

These photos are from a member in Ireland.
I know we are not subjected to as many building codes as you lot
over there and this allowed me a lot more flexibility to get things done....
I had a very good engineer helping me. Any time I ran into a
difficult spot, he was on the other end of the phone day or night with
helpful advice. It took me 20 months to build start to finish. Every spare
minute I had was spent on site (Life was put on hold for this time). Finish
work at 4pm, on site by 4.30pm working until about 8.30pm. every mid week
day. Weekends, holidays, etc. were entirely consumed with the house.

The tasks I took on.....
Setting out the ground work, installing the re-bar, pouring the
concrete,
(I hired a professional contractor to build the blockwork and
another to roof the main house)
Hired a mini excavator for a few weeks and landscaped the garden,
(great fun),
Flooring the second level with 3/4" OSB sheeting,
Frame the second level walls and sheeted every surface...
Did the first & second fix plumbing (this was the trade I took on
first out of college years ago),
Completed the finish carpentry (skirting, window boards, doors, door
trim, saddles, locks, etc)
Chased walls for electrical and fitted outlet boxes,
Built the stairs (Thanks Dave)
Wired & comissioned the house with an alarm (evening college course
for this one)
Hired a professional contractor to build the blockwork for a 2
storey 30 X 22ft, workshop (yippee) and built the roof myself (really proud
of this one)
Built a cupola (cherry on the cake)
Fitted PVC fascia & soffit to house & workshop.
My wife & I painted the ceilings & walls during our 2 week vacation.
Fitted crown moldings in 3 rooms.
Had a face frame kitchen custom made and my wife & I fitted it in a
weekend.
Built a timber deck.

Now that I can finally sit back with a beer in my hand and recount
the things that I did to build this house, I can admit the feeling of
satisfaction is somethig else. Pretty beat out from it though. I'm 34 now
and will definitely not be building another house this way........... for a
while....

I have a lot of tools, but the most useful one was the internet.

Kev
![]()

![]()

![]()
![]()
These photos show a project that was built with Dave's emailed advices. (For the newsletter that gives these emails click here.)
As of about midnight last night, you can now walk up and down our new stairs!
It is a glorious thing!! Everything came out just as you instructed and it
looks great so far. I'll finish up the insulation under the stairs and
finish up the sheetrock over the next couple of days.

Art

![]()

![]()
![]()

![]()
![]()
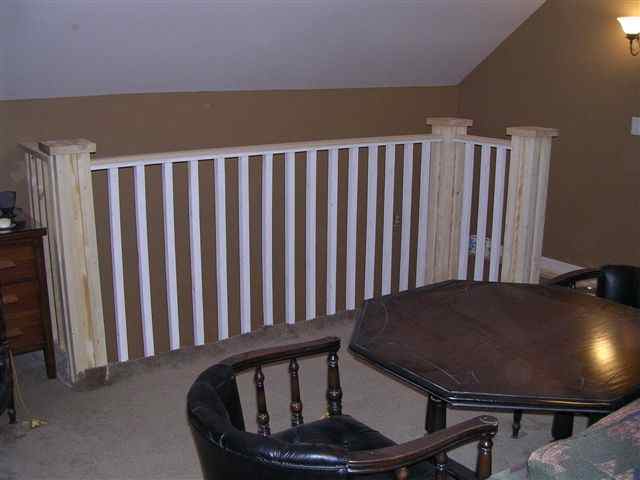
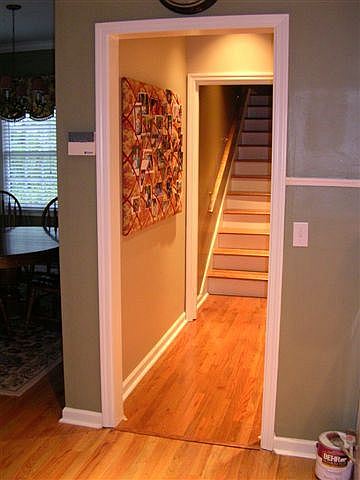
Here are photos of the finished stairs and the railing.
![]()

![]()

![]()
![]()

![]()

![]()

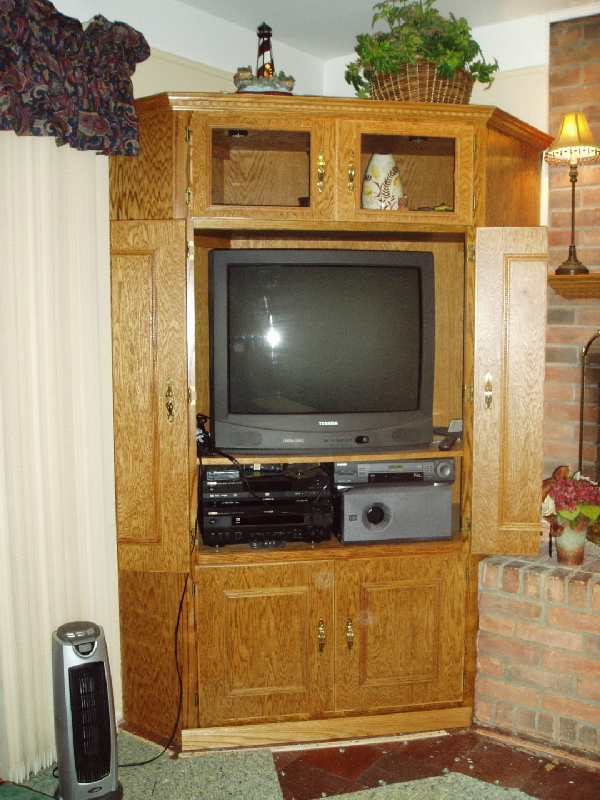
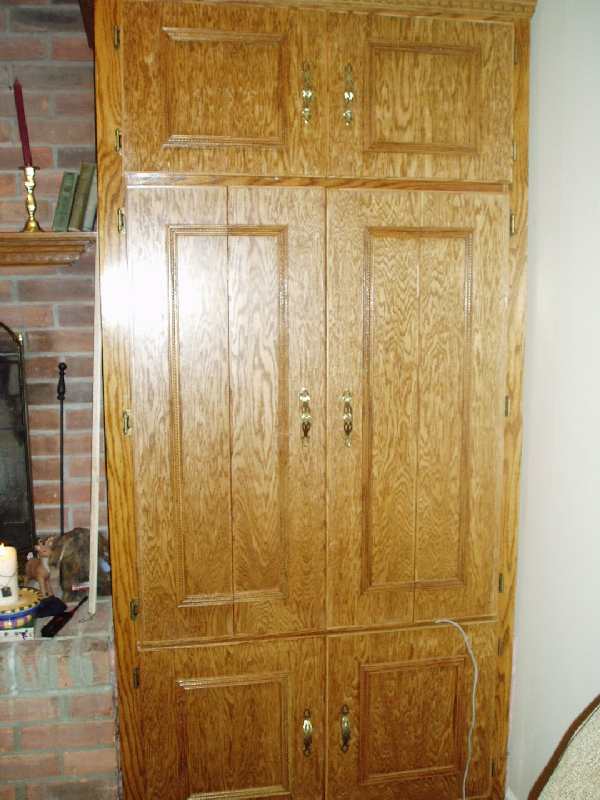
Allison's armoire:
Here are some pics of the TV armoire and computer cabinet that we finished
last fall. It really came out 1000 times better than we ever thought we
could make.
Since then, we have made a sofa side cabinet and a knickknack table. We are
having so much fun.
Our next project is going to be building a sofa bed and cabinet for an
enclosed trailer. We love to go riding with ATVs and want a hauler that
would double as a sleeping area. With your assistance and confidence we
feel that we can just about do anything.

![]()

![]()
![]()

![]()
![]()
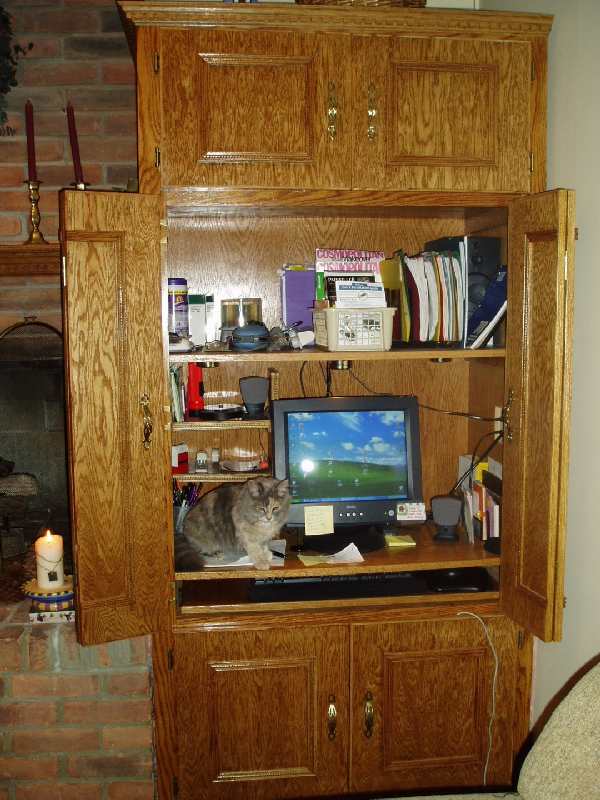
Allison was not a member of our website when she sent me the email below and had very limited experience in building projects out of wood, especially one so demanding as this entertainment center. I convinced her to join so she could get the information in my articles and gain a bit of knowledge in terminology. After an exchange in emails I was able to determine what she actually wanted and drew up the custom plans for her.
I am very proud of the finished project and the work that Allison and her son achieved. Allison thanks her friend, Nick, for taking on the role of master woodworker and doing most of the work. Great job all of you!!
Hello,
I would like to build two floor to ceiling cabinets on either side of
my fireplace, in the corners, in my family room. One of the cabinets-
entertainment centers I would to like hold a TV, DVD, VCR, receiver etc.
I have pics/ideas of what I am looking for. I would like for them to be
built-in looking. The other side I would like for it to hold my computer
and accessories. The materials I would like to use can be as basic as
possible on the sides but nice in the front. I would like the TV and
Computer part of the cabinet to have bi-fold doors. Each cabinet would
have six doors or doors and drawers. I am a beginner woodworker but have
a son (that has taken woods classes at the school and a friend that
would be able to help me. We are ready to start asap.
Your source for building tips, woodworking & furniture plans, house plans and building advice directly from Dave...
Hi, I'm Dave Osborne. With over 50 years experience as a journeyman carpenter, foreman and contractor in heavy construction I enjoyed working with apprentices and sharing the tricks of the trade that others shared with me. Now I get emails from Members all over the world and we include many of my answers in our Free Monthly Newsletters. Some of my answers include drawings and instructions specific to a project, but may also answer your questions. I use correct construction terminology, so you can confidently inform your building supply dealers or contractors exactly what you need.
ASK DAVE!
The Benefits of Membership
Membership gives you full access to our hundreds of how-to articles, woodworking plans, converters, calculators and tables. Our Stair Calculator is one of the most popular on the internet. We have projects you can build for (and with) your kids, furniture for your wife, and sheds and gazebos. If you run into a problem or need advice your Membership includes unlimited email questions to me through our Ask Dave quick response button.
Join us!
Copyright © 1999-2026 DDFM Enterprises. All Rights Reserved. DDFM ENTERPRISES, DAVE'S SHOP TALK and the Dave Osborne logo are trademarks and service marks owned by DDFM Enterprises. All other trademarks on this site are the property of their respective owners. Site design by Design Strategies, Inc.