Building Confidence
| Volume 17 Issue 2 ISSN 1923-7162 |

Welcome to Dave's Shop Talk's Home Improvement Newsletter of questions from our members on their construction projects, a Tip of the Month and a home remodeling article, both from our website at http://daveosborne.com.
Tip of the Month
When removing studs from a bearing wall, be sure to install a header and posts to carry the weight over the opening.
And a Bonus Tip:
For cutting stucco, plaster or masonry with a circular saw, use a carborundum blade. For cutting steel or metals use an aluminum oxide blade.
Ask Dave!
We received quite a few emails asking for more info about me, so for the next few issues of this newsletter, I'll give some of my biography as it relates to my construction career.
It started in July and August of 1960, my father was the Superintendent (and Project Manager) on a bridge job west of Williams Lake in the interior of the province of British Columbia, (BC) Canada. Most think Canada is the Cold North. Not in the Summer months! Dad and I were used to moderate temperatures in Vancouver, but on the bridge site we experienced temperatures of 120° F that summer. I was getting nose bleeds it was so hot. I was still in high school that year. I wasn't supposed to be working at age 15, but Dad pulled some strings with his boss and got me pulling nails out of boards used for formwork. Dad came to me one day and told me to start straightening the nails that were laying on the ground all around me. He bought out all the nails in the store in Williams Lake and the guys on the job had run out.
Dad's job was to build a steel bridge with concrete deck next to a wooden bridge built by the Army Corps of Engineers around 1903.
Here is a photo of the old 1903 single-lane wooden bridge.

Here is a photo of the new steel bridge Dad built in 1960.

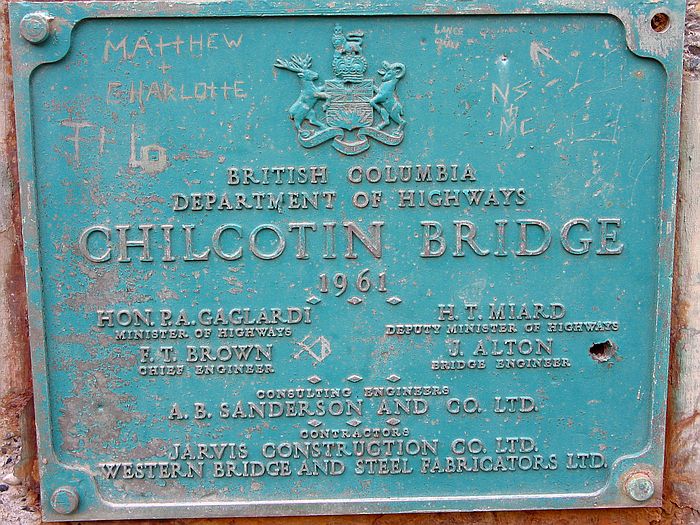
Here is the original plaque at the end of the bridge. The bridge is still standing strong, but the plaque could use a renovation!
After the new bridge was completed, Dad told me that the Army came back and blew up the old bridge with explosives. All the pieces went floating down the river. We would never see something like that happen nowadays!
Jarvis Construction Company had too many projects going and ran out of cash, so could not afford to rent a crane! Dad rigged up a way to winch the steel beams across the river into place where they were riveted together. After the bridge was built and the concrete bed was poured he rigged up a flat deck pickup with an A-frame, along with the winch, to lift the steel handrails into position along each side of the deck. Jarvis, the owner of the construction company, said he would have gone bankrupt without Dad's ability to solve problems like he did.
What an experience for a 15 year old kid being part of a major project like that.
Dave
Feature Article of the Month
(taken from our website: DaveOsborne.com)
Deck 3: Deck Design
I built a backyard wood deck about 22" off the ground, at the back of our house. I didn't want to install handrails so I decided to install seats around the perimeter instead. This article is more about how to design a backyard wood deck than the structure of the deck. The structure is the same regardless of the height of the deck off the ground. A backyard wood deck still requires footings, posts, beams, joists and decking material. You can refer to the first article, Deck 1: Raised Backyard Wood Deck on how to construct a backyard wood deck.
Backyard Wood Deck

According to the building code, backyard decks lower than 24" from the ground do not require handrails around the deck. We don't want our guests to step off backwards either, so I put in seats around the perimeter of the deck. We've had many people sitting around chatting on our backyard deck.
Design Change
Where the herb box sits, I originally intended to build a set of deck stairs go down to the lower front of the house. I changed my mind, so the planter box filled in the gap nicely, and is quite functional.

Deck Stairs
The steps coming off the backyard deck are very simple in their construction. I designed a box using treated 2x6s, ripped to the correct height of the first riser, less the treads. I attached another box on top of this one to provide support for the second step.

Deck Benches
The seats on the backyard deck are supported with 2x4 frames every 16" apart with 5/4 x4 rounded edged cedar decking material. These boards are a full 1" in thickness and are the same ones used for the deck surface itself. The boards are spaced 1/4" apart to allow rain water to pass through. I used the same boards for the skirt to keep wild critters out from under the backyard deck, as well as giving an aesthetically pleasing finish to the underside of the deck.

Deck Design Idea
An advantage of designing a deck like this yourself is adding extra options you may want. I always need storage space for construction materials, so I incorporated storage and an access under the deck, as shown below and in the top photo, as well.

I hope this article shows that designing a deck for your own use is not that difficult. Look at magazines and websites for articles and photos for various ideas to incorporate into your own design.
Dan and I thank you for your interest and support of our Website. We hope we can help you with your present and future projects.
Get complete access to our website - Subscribe Now!
We BUILD CONFIDENCE. If you need advice on Building or on your projects at work or home you can make a very small investment and subscribe to our website, then send me any questions or uncertainties you might have via email. There is no extra charge. That is all part of your membership to our site!
Please tell your friends and family about our site and this Newsletter.
Dan and I thank you for your interest and support of our Website!
Your source for building tips, woodworking & furniture plans, house plans and building advice directly from Dave...
Hi, I'm Dave Osborne. With over 50 years experience as a journeyman carpenter, foreman and contractor in heavy construction I enjoyed working with apprentices and sharing the tricks of the trade that others shared with me. Now I get emails from Members all over the world and we include many of my answers in our Free Monthly Newsletters. Some of my answers include drawings and instructions specific to a project, but may also answer your questions. I use correct construction terminology, so you can confidently inform your building supply dealers or contractors exactly what you need.
ASK DAVE!
The Benefits of Membership
Membership gives you full access to our hundreds of how-to articles, woodworking plans, converters, calculators and tables. Our Stair Calculator is one of the most popular on the internet. We have projects you can build for (and with) your kids, furniture for your wife, and sheds and gazebos. If you run into a problem or need advice your Membership includes unlimited email questions to me through our Ask Dave quick response button.
Join us!
Copyright © 1999-2026 DDFM Enterprises. All Rights Reserved. DDFM ENTERPRISES, DAVE'S SHOP TALK and the Dave Osborne logo are trademarks and service marks owned by DDFM Enterprises. All other trademarks on this site are the property of their respective owners. Site design by Design Strategies, Inc.