Building Confidence
| Volume 18 Issue 8 ISSN 1923-7162 |

Welcome to Dave's Shop Talk's Home Improvement Newsletter of questions from our members on their construction projects, a Tip of the Month and a home remodeling article, both from our website at https://daveosborne.com.
Tip of the Month
To get rid of the smell of smoke in a house, vinegar works wonders on odors. Setting out small pans reduces odors very well. Another good idea is cotton balls soaked in vanilla extract or used coffee grounds to absorb the smell.
KEEP BUSY! Now's a good time to catch up on your projects!
Ask Dave!
This month we discuss a reno on an older home that we did for my daughter and her family.
During July and August my wife, Frances and I were helping our daughter, Jacqui, her husband, Mario and their two kids, Sheldon and Katelyn renovate a house they just bought. The plan was to start on the upper floor and renovate the four bedrooms; covert a walk-in closet to an ensuite and change the out dated fixtures in the main bathroom.
We started with an Eco Audit from a government authorized company to collect information on the insulation values in an older home, before and after a renovation has been done. If the difference in the before and after calculations are large enough, certain grants are offered to help pay for the cost of installing insulation, windows, etc. to get the older house up to present day eco standards. There are programs like this in both Canada and the United States.
While Mario was removing the old style window valances the women and kids were removing up to 3 layers of wallpaper on the the bedroom walls, some of which were painted over. Frances found that vinegar and water (1/4 cup of vinegar to 1 gallon of warm/hot water) worked best. She applied the solution with a plastic mister bottle, dampening the wall to the point of run off. Don't over saturate the surface. If the wall was covered with vinyl wallpaper, she would lightly sand the surface so the solution would penetrate better. This had to be done with painted wallpaper, as well. She found that it worked well if she could start at a seam and lift it and spray under the paper as much as possible. Sometimes, renting a wallpaper steamer also works well. Don't wet the drywall paper covering too much, or gouging the surface is easy to do.
Mario discovered that removing the valance exposed the wall framing, so he had to install new drywall to match the existing surface. I was impressed with his mudding skills at the end of this project. One would think that an airline pilot would not want to fly into a project like this, but Mario dove right in. The mother of a friend of theirs reproached her daughter, "You did your renovation the lazy way, not removing those old valances." They do date the house, alright.
Here are some photos at the early stage:

Frances is wiping the residue off. Notice the Valance removed to the upper left and the carpets are gone.
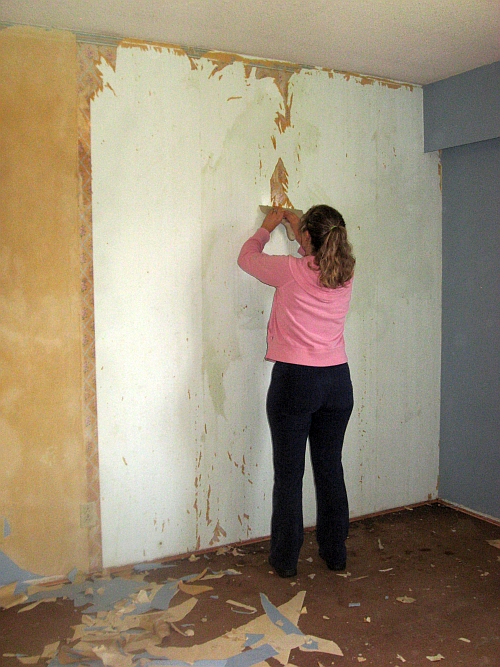
Here, Jacqui is removing the wallpaper with a large scraper. Notice the window valance to the upper right, has not been removed, yet.

Dave and Sheldon are working together to remove the existing wall between the walk-in closet and the 2 piece ensuite. Mario has the valance removed in the bedroom and working in another bedroom to replace the drywall. This wall was not a bearing wall so could be removed without structural problems.

While the men are working, Katie and Scruffy, our cat, are catching up on their beauty sleep. Actually, Katie was a big help in removing the wallpaper and in the painting process. I can't say the same for Scruffy.
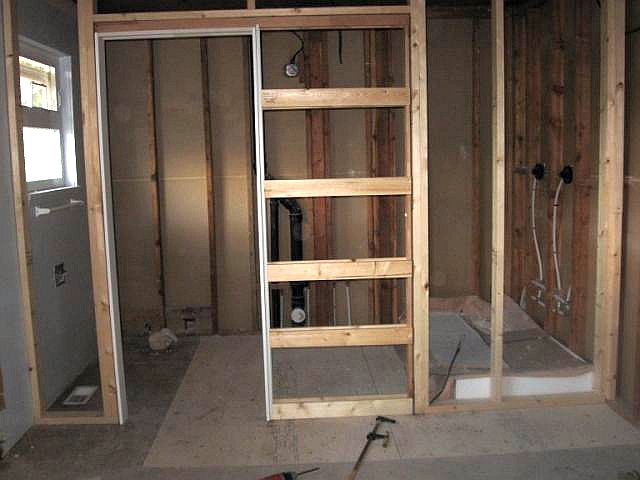
Framing for the pocket door is complete. The shower base and water supply to the dual control shower heads is being installed.
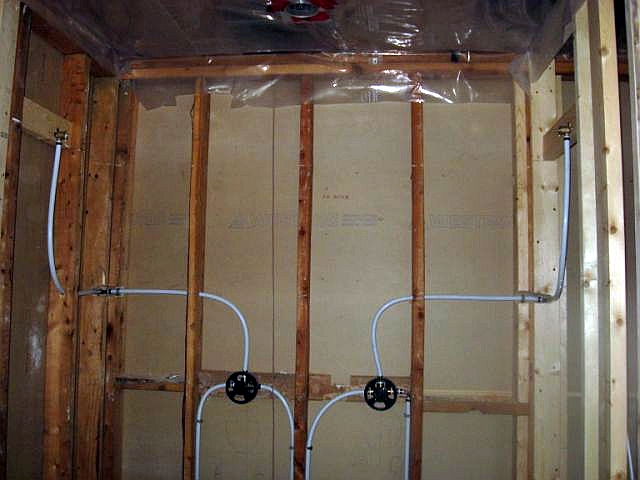
Getting ready for drywall. The rough-in for the shower valves and heads are installed, including the pot light over the shower and the ventilation fan. The ceiling vapor barrier is up, ready for cement board around the shower and drywall for the remaining surfaces. Notice, I tried to eliminate as many 90's, as possible, with the Pex plastic tubing. Apparently, adding one 90 degree elbow, in Pex, is the equivalent of adding 10 feet of piping.
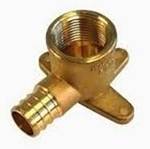
The shower head is threaded into a drop ear 90 elbow. Screws can be fastened through the drop ears to hold it securely to the framing backing.

Here I brought the water supply to each fixture using 1/2" Pex from a main branch of 3/4" Pex.
If you have any questions on the procedures you see here, send me an email.
I'll continue with our reno in the next newsletter.
Here is a free article from our site DaveOsborne.com for you.
Plumbing and Ventilation 1: Plumbing Rough-in Dimensions and Instructions
(From https://daveosborne.com/dave/articles/plumbing-rough-in-dimensions.php
Introduction:
I'll give you the usual heights and dimensions for plumbing fixture drains and supply lines for home improvement rough-in. Follow the directions that come with your new plumbing fixtures. Try to get an idea of the plumbing fixtures you want to install before the house framing stage since some plumbing fixtures will need backing to support them.
I'm really partial to the plastic piping that can be used for hot and cold water supply lines, rather than the straight copper pipe with solder joints. Less expensive, too. They use copper or brass crimp on fittings so no soldering is needed.
The plumbing rough-in stage is made easy with stub-out elbows which are sealed so the water can be turned on for checking for leaks before the walls of the house are sheeted. These usually are available in your local home improvement stores now. A crimper is required but can be rented for a nominal amount, $10 to $15 per day or purchased, of course. They are not cheap to purchase though, ranging from $200 to $300.
After the wall finish is applied and painted, the water is turned off, the stub-outs are cut off to the appropriate length and escutcheon plates and shut off valves are installed. The shut off valves can be 5/8" OD compression fittings rather than the solder type.
Toilet:
Toilet Floor flange: 12" from finished wall to center of the toilet floor flange, screw down the 3" ABS flange on the sub-floor with stainless screws. A 3" ABS 90 degree elbow is usually connected to the floor flange. This is the only time you can use a 90 degree bend in a waste system, as a vertical 90. When turning a 90 laterally, use two 45s.
Vent: Keep the vent within 5' of the floor flange, the vent can be 1 1/2", usually on top of a 3" stack.
Cleanout: The toilet itself can be removed quite easily so a cleanout is not needed. Put a cleanout at the bottom of the 3" stack, along with an expansion joint if the stack enters a concrete floor in the basement or crawlspace.
Supply: One supply for cold water is installed 9 1/4" from finished floor and offset 6" to the left of toilet center. This is terminated with a shut-off valve with a 3/8" O.D. (outside diameter) compression fitting. A closet supply tube is attached to this fitting complete with compression ferrule. The other end is a closet tapered fitting attached to the supply tube from the toilet tank. No washers required.
Countertop or Drop-in Lavatory:
Drain: Set the drain on center of the sink and 18 1/2" from the finished floor. Usually the waste through the sink is 1 1/4" so use a 1 1/2" hub x 1 1/4" ABS slip joint adapter onto the tailpiece coming through the sink.
Vent: Keep the 1 1/4" or 1 1/2" vent within 5' of the p-trap, usually the vent pipe goes vertically up the wall behind the center of the sink and is attached to the sink waste with a sanitary tee.
Cleanout: A cleanout must be provided past the p-trap. The easiest way is to use a union p-trap and slip joint adapter, rather than a cleanout adapter which has to be provided an access hole outside the wall.
Supply: Install hot and cold supplies on the sink centerline at 8" centers and 21" from the finished floor terminated with a shut-off valve with 3/8" compression fittings. Lavatory supply tubes or risers, smaller than the closet tube on its ends, are attached to the sink faucet. Some faucets are supplied with risers for the standard 3/8" compression fittings.
Pedestal Lavatory:
Drain: Since the tolerances on a pedestal sink are very limited, I usually go by the actual sink itself. There are a lot of off-shore pedestals out there without any standards. For a sink with the top of the rim at 32" above finished floor, set the drain centered with the sink and 18 1/2" above the finished floor
Vent: Same procedure as the drop-in lavatory. I usually go with ABS, but for a high-end unit go with chrome. Most of the drain is hidden in and behind the pedestal.
Cleanout: Same as the drop-in lavatory.
Supply: Same as the drop-in lavatory, but go with 4" centers on the shut-offs. Since a pedestal sink is wall hung install the necessary backing during the framing stage.
Bathtub and Shower:
Drain: Set the drain to the particular bathtub, access is needed through the floor. The 1 1/2" drain goes through the floor and is connected to the stack with a sanitary tee from inside the joist space or below it depending on which way the floor joists run. The drain for a shower only is 2". It is tough to replace a bathtub if the ceiling below is finished, I usually access the floor through a wall rather than the ceiling. Choose the lesser of two evils to repair. The drain is connected to a waste and overflow (W&O), which is bought separately from the bathtub and connected prior to installing the bathtub. Choose the particular means of stopper: plug, twist and turn, push button, etc. Follow the instructions that come with the bathtub, usually these are very good. With a bathtub that comes with the surround as a one piece, install this on the sub-floor prior to framing up the walls so you can get it in place. It won't fit through doors, that's why they make a renovator bathtub and enclosure in two pieces, so you can get it through the doors, then install it after attaching the two pieces together. If the unit is against an outside wall, insulate and vapor barrier the wall before installation.
Vent: The stack can be used as a wet vent if it is within 5' of the p-trap, otherwise use a 1 1/2" vent through the wall similar to the vent on a lavatory.
Cleanout: This is a tough one, check with your local building codes. Usually the ceiling and walls are finished around a bathtub so there is no access. This holds true especially if the supply is on an outside wall, to be avoided if at all possible. The p-trap must be glued at both ends since it is in the floor without access. If accessible a p-trap with cleanout may be installed. Usually, we can remove the drain screen or pop up mechanisms fairly easily and remove hair and assorted good stuff from inside the bathtub.
Supply: The control valve is part of the rough-in before the walls are finished. Install the control 15" above the rim of the bathtub and 54" above the finished floor for a shower only. For a bathtub without a shower the control should be placed 10 1/2" above the rim. Modern controls have the spout separate. For a bathtub and shower install a spout with diverter 4" above the bathtub. For a bathtub only install the spout at 4" above the rim, as well. The shower head is connected to the control with appropriate piping at a height of 78" from the sub-floor. The hot and cold water supplies are connected directly to the control valve. Standard connection is hot on the left, cold on the right when facing the bathtub or sink. Some valves have threaded connections, others have solder type fittings. Remove the innards of the control when soldering fittings to it. Usually the innards are made of plastic and rubber parts. When finished the connections, turn the water on to check for leaks, before the walls are covered.
Curtain Rod: Install the curtain rod brackets 76 1/2" from the floor centered on the curtain rod. Friction fit or spring loaded curtain rods are also available.
Kitchen Sink:
Drain: Set the 1 1/2" drain 16" from the finished floor, centered for a single bowl, offset 8" to the left of center for a double bowl. I prefer to make up my own ABS waste connections between bowls, you can purchase these but they are expensive.
Vent: Same as the bathroom lavatory.
Cleanout: Same as the bathroom lavatory, use a union p-trap with slip joint adapter attached to the tailpiece connected to the basket and strainer coming through the sink. Usually most brands of stainless steel sinks come with the basket, strainer and tailpiece included.
Supply: Install the hot and cold supplies at 8" centers centered on the sink and 23 1/4" above the finished floor terminated with shut-offs. The risers from the shut-offs to the kitchen faucet are the same as the lavatory risers. Some are supplied with the faucet so check that out. When ordering a kitchen sink be aware of the number of holes in the faucet deck. Usually three hole sinks are common with a fourth hole for a sprayer or soap dispenser. Match the number of holes with the faucet. For single lever faucets, usually a mounting plate for a three hole is included.
Bathroom Accessories:
Toilet Tissue Holder: Install this about 24" high from the finished floor, centered on the toilet roll and even with the front face of the toilet bowl.
Towel Bars: Install these 45" to 48" above finished floor.
Dave
Read hundreds of diy articles, answered questions and dozens of plans and projects all written by Dave.
Become a Member and Dave will personally eliminate any doubts you might have about your projects by email.
Dan and I thank you for your interest and support of our Website. We hope we can help you with your present and future projects.
Get complete access to our website - Subscribe Now!
We BUILD CONFIDENCE. If you need advice on Building or on your projects at work or home you can make a very small investment and subscribe to our website, then send me any questions or uncertainties you might have via email. There is no extra charge. That is all part of your membership to our site!
Help us with the cost of putting this info out by becoming a member. Subscribe now!
Please tell your friends and family about our site and this Newsletter.
Your source for building tips, woodworking & furniture plans, house plans and building advice directly from Dave...
Hi, I'm Dave Osborne. With over 50 years experience as a journeyman carpenter, foreman and contractor in heavy construction I enjoyed working with apprentices and sharing the tricks of the trade that others shared with me. Now I get emails from Members all over the world and we include many of my answers in our Free Monthly Newsletters. Some of my answers include drawings and instructions specific to a project, but may also answer your questions. I use correct construction terminology, so you can confidently inform your building supply dealers or contractors exactly what you need.
ASK DAVE!
The Benefits of Membership
Membership gives you full access to our hundreds of how-to articles, woodworking plans, converters, calculators and tables. Our Stair Calculator is one of the most popular on the internet. We have projects you can build for (and with) your kids, furniture for your wife, and sheds and gazebos. If you run into a problem or need advice your Membership includes unlimited email questions to me through our Ask Dave quick response button.
Join us!
Copyright © 1999-2026 DDFM Enterprises. All Rights Reserved. DDFM ENTERPRISES, DAVE'S SHOP TALK and the Dave Osborne logo are trademarks and service marks owned by DDFM Enterprises. All other trademarks on this site are the property of their respective owners. Site design by Design Strategies, Inc.