| NEWSLETTER from DaveOsborne.com | ||
| “Building Confidence” | May 2008 | |
Welcome
Welcome to our newsletter from the website that builds confidence so you can build it yourself.
What's New!
This month Dan and I have been busy organizing our past newsletters into our main Index Page. This way you can easily search for a question and find its answer. Checkout our revised Index Page at: http://daveosborne.com/dave/index.php
Ask Away!
Let's go over the questions for May.
Hi Dave,
Wife wants me to bid on a massive 8' 2" tall x 6' 4" wide double
entry door, what should I do or use as a header. This will be on
a new 2 x 6 construction. The ceiling is 10' and this is a load
bearing wall.
Hi James,
Here is a drawing of a typical header for a 2x6 wall. Minimum header is double 2x8 for a 6'-4" opening.

In your case you can do the same thing as in the drawing, but add another plate about 1/4" above the jamb with studs up to the header trim. As shown here:

Notice that the cripples come right up under the header and the lower plate comes to the side of the cripple. This is so the cripples support the header directly.
You should have the opening large enough so that there is about 1/4" clearance on all three sides of the jamb available for shimming.
Dave
Hi Dave,
I was hoping you had a design for a skirt for a corner Jacuzzi.
I recently purchased a Jacuzzi Espree 6060 and I am looking for
some advice on how to build a proper frame or skirt for the unit
to fit in. Each of the sides against the two walls are 57-7/8"
then take a 90 degree turn for 22-11/16" from each side and end
with the front section of 49-3/4". It needs to be constructed in
such a way as to create a service access panel or door on the
right side. Any suggestions you might have would be great.
Here is a link to the diagrams: http://www.jacuzzi.com/pdf/ESPREE.PDF
Thank you for your consideration,
Paul
Hi Paul,
I don't have a skirt design as such, but I can tell you how I built the skirt and surround for my Jacuzzi.
Here are some pictures.

This pic shows the overall view of the Jacuzzi and skirt. The center is solid and the two ends are removable panels, held on with cabinet door magnets.

Here is the left panel removed showing access to the motor (enclosed in insulation). The entire tub area is enclosed in insulation to dampen the noise, as well as keep the water in the tub warmer, longer.
Notice the 4 magnets to secure the panel door. You could use concealed hinges, such as Euro hinges, with a clasp. I wasn't intending these panels to be removed much, but the wife, stores stuff inside.
Here is a closeup of the magnet.

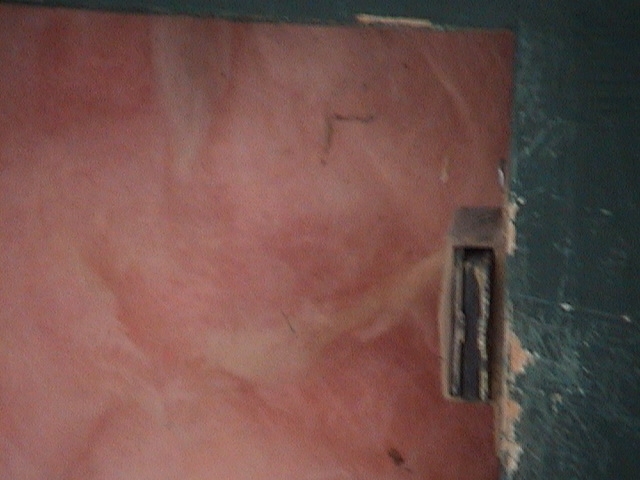
This shows the framing detail to support the tile work. The tub itself sits on the floor. The tub surround is ceramic tile and wood painted molding. Make the surround strong so there is no give and take for the tile grout to crack. On top of these 2x4s is 5/8" plywood, glued and screwed. Studs are on each side of the openings and in the middle of the center panel to give good support.

A look with both panels removed.
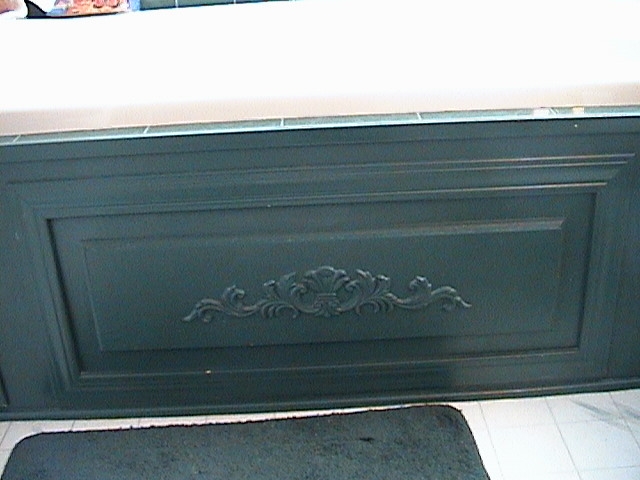
A close up of the middle panel, which is permanent. Notice I used 3/4" MDF for the panel. Routered the edges and used 356 colonial casing backwards to create some depth around the MDF. Then applied a wooden glue on decorative piece.

And finally, the left panel, decorative effect.
Hope this inspires you with ideas. Any other questions, just ask. For safety reasons, this tub motor needs a GFCI breaker in the panel.
Dave
Dave,
Few questions:
1. What type of nail gun & what size nails should I buy to install the
plywood in the carport?
2. Need to know what is the rough door size for a 24"
door and a 30" door?
As usual, Thanks!
Fred
Hi Fred,
There are 3 finishing guns out there: 18 gauge, the lightest, is used for fastening casing, base and light finishing work. The 16 gauge is a bit heavier for your ceiling finish in the carport, cabinet work, etc. The 15 gauge is a bit heavier, still, used for flooring at nosings and face nailing close to the wall, stair finishes, etc. The 15 ga. is not as popular as the other two.
For the ceiling plywood, use a 1 1/2" nail, at least. Even drywall screws would be good, covered with a small baton. A baton is a strip of wood, in this case to cover the joints of the plywood. For a ceiling you can make a pattern of the strips - every 2'; every 4'; etc.
For inside door rough openings allow 2" wider than the width and 2 1/2" wider for the length. For example, a 24 x 80" door opening is 26" x 82 1/2" and for a 30" door is 32 x 82 1/2".
Dave
Dave,
 We're planning on adding a room on the back of the house. My
question, my wife wants a pocket door to the new room. Can this be
framed in a 2X4 load bearing wall? It would be 36" wide. Any special
header needed?
 Thanks, Jim
Hi Jim,
You can put a pocket door in an exterior wall, no problem, with the proper header. You need a header over the pocket and the door opening. For a 6' span a double 2x8 header is needed to support a roof only. We usually use a double 2x10 tight under the top plate without any header studs.
Let me know if the wall only supports the roof and not a floor or two plus a roof.
Dave
Hi Dave, I am building a 12' x 16' Gambrel-roof barn using your plans.
My question concerns ventilation; what do you recommend using, a
ridgeline vent, or something else? Thanks, Robert
Hi Robert,
Unless the shed is being heated with an attic space, no ventilation is required.
If you are worried about musty air in a high humidity area, I would suggest the best cross ventilation would be a vent in each gable end.
Dave
Hi Dave, we talked late last year about a screen porch I'm building
on my deck, and I have started construction. My trusses will be
delivered by the end of the week. The roof is a 5/12 gable that will
intersect the main house at 90 degrees. My question is about the
location of the plate nailed onto the existing roof that the jack
rafters will tie into. I have your rafter tables in hand so figuring
the length of the jacks shouldn't be a problem. I was thinking
about 2 X 4 jacks and a 2 x 6 plate. I know the two plates will meet
at the ridge beam, but where do they end up at the existing top
plate of the house? Can I attach the jacks to the ridge beam, then
snap a line at the bases to find the correct position of the plate?
This seems a bit bassackwards! There probably is a formula, but
I haven't been able to find it. Any help would be appreciated.
By the way, the span is 170 inches, and the length of the addition
is 178 inches. If you need more info, drop me a line. I hope I made
this clear enough for you to understand. Love your site...it has
really helped me out the last two years.
Regards, Bob
Hi Bob,
The trusses may include a valley set for on top of the existing roof. If not, here is what to do: Remove the roofing over the sheathing in the affected area. Leave the sheathing in place. Extend the ridge line from the new trusses to the existing roof, level and centered. Use a string line from the gable end of the new addition, attached to the center of the ridge of one of the trusses, extending out over the existing roof. Hammer a nail into this point. The valley will join at the intersection of the new and existing line of the eaves, not the wall line and connect at the ridge point at the nail. Snap a line here. Don't fasten the valley plates down for the jacks until you determine where they will be in relation to the valley line. Since the plate is up off the roof by 1 1/2", its edge will be inside the valley line when the jack rafter is flush with it. The sheathing will actually come to the valley line, not the plate or the jack. This should become clearer when you get up on the roof and actually layout the valley line and the line of the plate inside of it a bit. The rafter tables don't do much good for this layout since the jack rafters are sitting on the sheathing instead of tied to the valleys. But use the square to get the angle of the cuts for the rafters as usual. The ridge against the sheathing is the horizontal cut (not the plumb cut) for the correct pitch of the existing roof. The jacks against the valley plates are the same as the horizontal cut for the jacks rather than the side cut, as usual. Also remember the pitch with 17 for the valley cuts, not with 12 as with a common rafter.
Here is a drawing:

Dave
Hi Dave,
I apologize if I am contacting you incorrectly with my question.
I also have a kneewall at the top of the staircase that I would
like to finish off the top with a length of finished oak.
Do I have to have it routered at the edges?
I am trying to do this myself and I am having a difficult time
in finding where to purchase the right materials including the
lumber.
Thank you for any help you can offer.

Linda
NY
Hi Linda,
Nothing says you have to have the edges rounded over with a router, but it is the preferred way. What is important is that the edges are smooth to prevent slivers. Another reason we like to round over edges is so paint or varathanes will stick. They won't on sharp corners.
Most building supply stores sell 1x6 in oak and fir and others. These boards have a mill finish on them which should be removed by sanding, before stain or a clear finish is applied. At the same time you can round the edge over slightly with sandpaper on a block of wood.
Hope this helps,
Dave
Dave,
I am putting a walkway of paving stones from my front porch to my
driveway.
The walkway parallels my porch at the end of the porch I would like to
put one step (shallow 3-5 inches) in the walkway. My question is how do
I handle the step.? Can you explain how to do this? The pavers of 6x9
nominally 3 inches thick.
Hi Mark,
Put in the pavers, as normal, under the step area. I would, depending on the rise needed, make a box with 2x4s or 6s ripped down to match the rise. Fill the bottom with compacted sand and install the pavers on top, flush with top of the box. So height of sand plus paver equals the rise. Make the tread width about 12".
Dave
Well, that's it for another month. We hope your projects are going well and you can relate to some of these questions.
Enjoy our website.
Dave
|
home | contact | articles | plans | downloads | dictionary assurance | cancel | newsletters Copyright © 1999-2026 by David E. Osborne. All Rights Reserved.
|